AWS Route 53 is a fast, reliable place to publish the three DNS records that
authenticate your email — SPF, DKIM, and DMARC — but its console has a couple of
conventions that trip people up: fully-qualified record names and mandatory
double-quoting of every TXT value. The records themselves are identical to what
you would publish on any DNS host; only the editor changes. This guide walks
through exactly where in the Route 53 console you add each record, what to type
in the record-name field for the root domain versus _dmarc versus your DKIM
selector, and the one quoting quirk that silently breaks long DKIM keys if you
miss it.
The short answer#
All three records are ordinary TXT records inside your Route 53 hosted zone. What differs from one host to the next is only the naming convention and the input format:
- SPF — a TXT record at the root of your domain. In Route 53 you leave the record-name field blank, and the record applies to the zone apex.
- DKIM — a TXT record at
<selector>._domainkey.yourdomain.com. You type just the<selector>._domainkeypart in the record-name field; the selector and the long key value both come from your email provider. - DMARC — a TXT record at
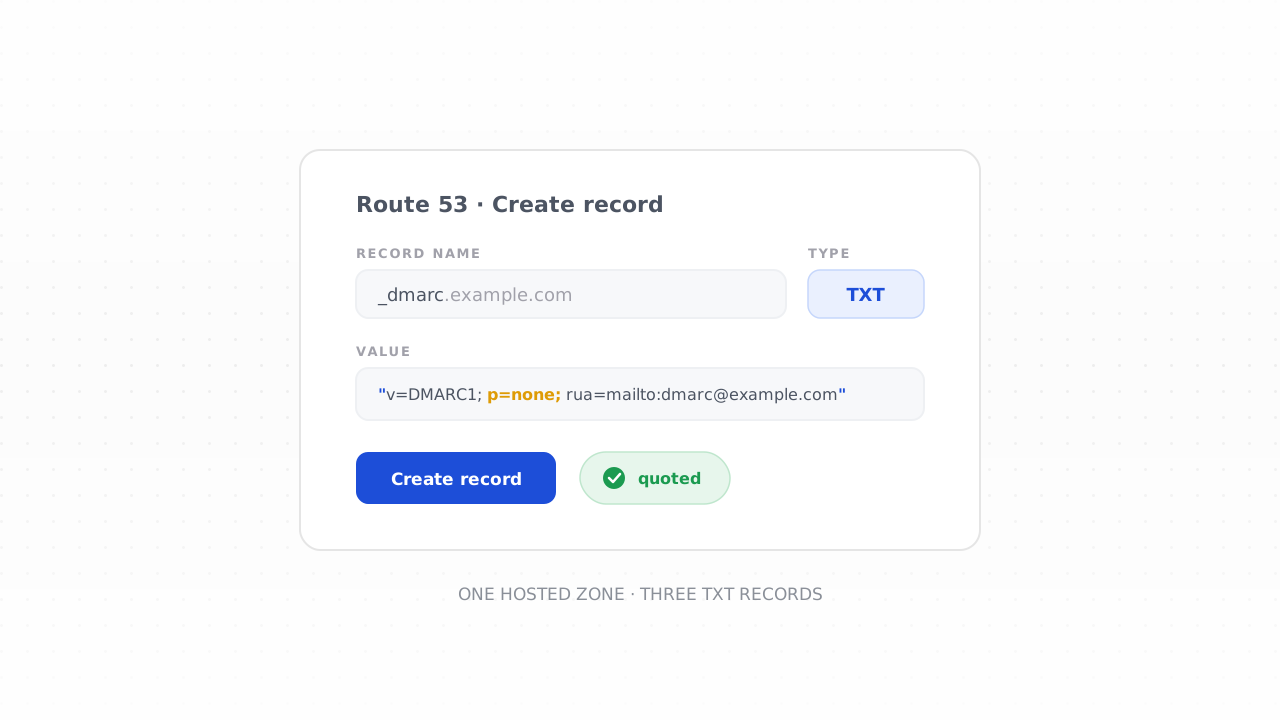
_dmarc.yourdomain.com. You type_dmarcin the record-name field and Route 53 appends the zone for you.
The values are provider-specific, so don't hand-write them. Generate your SPF line with the SPF record generator, your policy line with the DMARC record generator, and copy your DKIM key straight from your email platform's dashboard. For the concepts behind each record, the SPF, DKIM, and DMARC explainer covers what they do and why they matter.
How SPF, DKIM, and DMARC map to Route 53 records#
Route 53 organises DNS around a hosted zone — one zone per domain. Inside a zone, every record has a fully-qualified name relative to the zone apex, and the console makes that explicit: next to the "Record name" box it shows your domain suffix, and whatever you type is prepended to it. That single detail explains all three record locations.
| Record | Type it in "Record name" | Resulting name |
|---|---|---|
| SPF | (leave blank) | example.com |
| DKIM | s1._domainkey | s1._domainkey.example.com |
| DMARC | _dmarc | _dmarc.example.com |
Where to add records in the Route 53 console#
The path is the same for all three records. Open the Route 53 console, choose Hosted zones in the left navigation, and click the zone for the domain you send mail from. Click Create record, and if the console offers a "Quick create" versus "Wizard" toggle, Quick create is the simpler path for a single TXT entry.
In the create-record form you set three things: the Record name (the prefix,
per the table above), the Record type (TXT for all three), and the
Value. Leave the routing policy as the default "Simple routing" — these are
plain informational records, not traffic routing. TTL can stay at the default
(300 or 3600 seconds is fine); a shorter TTL just means changes propagate
faster while you are testing.
Publishing your SPF record at the root domain#
SPF authorises which servers may send mail using your domain. Create a TXT record, leave the record name blank so it lands on the root domain, and paste your SPF value. A typical value looks like this:
"v=spf1 include:amazonses.com include:_spf.google.com ~all"
Note the wrapping double quotes — Route 53 expects TXT values to be quoted, and
the console will usually add them if you forget, but it is cleaner to include
them yourself. The ~all at the end is a soft-fail; -all is a hard-fail that
tells receivers to reject unauthorised senders outright.
Two rules matter more than anything else here. First, publish exactly one SPF
record. If a second TXT record at the root also begins with v=spf1, SPF
becomes invalid and every check fails — so if you already send through another
service, merge all the include: mechanisms into a single line rather than
adding a new record. Second, keep it within ten DNS lookups; each include:
counts, and going over causes a permanent SPF error. The
SPF record generator builds a single valid line
from the providers you actually use and flags the lookup limit for you.
Adding your DKIM record at the selector#
DKIM publishes the public half of a signing key so receivers can verify your
messages weren't forged or altered. Your email provider gives you two things: a
selector (a short label like s1, google, or a random string) and the long
public-key value. You publish that key as a TXT record at
<selector>._domainkey.
Create a TXT record, type the selector plus ._domainkey in the record-name
field — for example s1._domainkey — and paste the value your provider gave you.
The value looks like this:
"v=DKIM1; k=rsa; p=MIGfMA0GCSqGSIb3DQEBAQUAA4GNADCBiQKBgQ..."
Do not invent or edit this value — copy it verbatim from your email platform's authentication settings, because the public key must exactly match the private key doing the signing. Some providers (Amazon SES among them) issue three CNAME-based DKIM records instead of a single TXT record; in that case create three CNAME records with the names and targets they supply, following the same "type the prefix, Route 53 appends the zone" rule. Whichever form your provider uses, the values come from them, never from you.
Publishing your DMARC record at _dmarc#
DMARC ties SPF and DKIM to the visible "From" address, tells receivers what to do
with mail that fails, and sends you reports. Create a TXT record, type _dmarc in
the record-name field, and paste a starter policy:
"v=DMARC1; p=none; rua=mailto:dmarc@example.com"
Start at p=none. That is monitoring mode — it changes nothing about how your
mail is handled but switches on the daily aggregate reports that make a safe
rollout possible. Only after the reports confirm every legitimate stream
authenticates in alignment should you tighten to p=quarantine and then
p=reject. Publishing p=reject on day one is the fastest way to send your own
mail to spam. The DMARC record generator builds
a syntactically correct policy, and the full
step-by-step DMARC rollout guide covers the
monitor-then-enforce sequence in detail; once reports start arriving,
reading DMARC aggregate reports explains how to
act on them.
The quoting quirk that breaks long DKIM keys#
This is the Route 53-specific detail worth slowing down on, because it fails silently. A single DNS TXT string is limited to 255 characters. Short values — your SPF line, your DMARC policy — fit comfortably inside one quoted string. But a 2048-bit DKIM public key is longer than 255 characters, so it cannot live in a single string.
Route 53's answer is to split the value into multiple quoted strings, each 255 characters or fewer, placed together in the same record value. DNS resolvers concatenate the strings back into one key. In the console's Value box, that looks like two adjacent quoted strings:
"v=DKIM1; k=rsa; p=MIGfMA0GCSqGSIb3DQEBAQUAA4GNADCBiQKBgQ...up-to-255-chars"
"...the-remaining-characters-of-the-public-key"
The catch: the two strings concatenate into one continuous key with no space between them, so don't add characters where you split, and keep both strings in a single TXT record value rather than letting them become two separate records. If your DKIM check fails right after setup and the key looks complete, an incorrect split is the usual culprit. Paste the whole key, let the console or your tooling handle the chunking where it can, and verify the result rather than trusting it.
Managing the records as code#
Route 53 is a favourite for teams that run infrastructure as code, and you don't
have to use the console at all. The AWS CLI publishes records with
aws route53 change-resource-record-sets, passing a JSON change batch that
specifies the name, TXT type, TTL, and value. In Terraform, each record is an
aws_route53_record resource:
resource "aws_route53_record" "dmarc" {
  zone_id = aws_route53_zone.primary.zone_id
  name    = "_dmarc.example.com"
  type    = "TXT"
  ttl     = 3600
  records = ["v=DMARC1; p=none; rua=mailto:dmarc@example.com"]
}
The same rules carry over: one SPF record at the apex, the DKIM value straight
from your provider, DMARC starting at p=none. The 255-character string limit
applies here too — a long DKIM key must still be chunked into multiple strings
within the record value, so apply the record and verify the published result.
Verify before you enforce#
DNS changes in Route 53 usually propagate within a minute or two, though your
TTL and downstream caches can stretch that. Once the records are live, confirm
all three resolve and parse correctly with the
SPF, DKIM, and DMARC checker — it flags a
missing or duplicate SPF record, a DKIM key that was split or pasted wrong, and a
DMARC policy with a syntax error, which are the three things most likely to go
wrong on Route 53. Only after the checker is green should you begin stepping the
DMARC policy up from none toward reject.
Getting all three published and passing is what satisfies the Google and Yahoo sender requirements for bulk senders. But remember the boundary: authentication proves who you are, not that you are a good sender. A perfectly authenticated message to a list full of dead addresses still lands in spam. The email deliverability guide covers the reputation and list-hygiene work that turns a trusted identity into inbox placement.
Frequently asked questions#
What do I put in the Route 53 record-name field for the root SPF record?#
Leave it blank. Route 53 applies a record with an empty name to the zone apex —
the root domain itself — which is exactly where the SPF TXT record belongs. Set
the type to TXT and paste your single v=spf1 ... value. Don't type @ or your
domain name in the field; an empty record name is how Route 53 expresses the root.
Why does my DKIM record fail in Route 53 when the key looks correct?#
Almost always because of the 255-character string limit. A 2048-bit DKIM key is too long for one TXT string, so Route 53 requires it split into multiple quoted strings that resolvers concatenate. If the split adds a stray space, drops a character, or the pieces end up as two separate records instead of one value, the key won't validate. Re-paste the full key, keep it as a single record value, and confirm with a DKIM checker.
Do I type _dmarc or the full _dmarc.example.com in the record name?#
Type just _dmarc. Route 53 shows your domain suffix next to the field and
appends it automatically, so _dmarc becomes _dmarc.example.com. Typing the
full name would produce a doubled _dmarc.example.com.example.com, which no
receiver will ever query. The same prepend rule applies to your DKIM selector.
Can I manage SPF, DKIM, and DMARC in Route 53 with Terraform or the CLI?#
Yes. Each record is an aws_route53_record resource in Terraform or a change
batch for aws route53 change-resource-record-sets in the CLI. The record names,
types, and values are identical to what you'd enter in the console, and the same
255-character split for long DKIM keys applies. Generate the values first, then
commit them to code and verify the published result.
Route 53 makes the three records straightforward once you know its naming and quoting conventions — but authentication is only the entry ticket to the inbox. Build your records with the free tools, then clean the list behind them with the free email checker: it catches dead domains, typos, and spam traps before they bounce, because a trusted identity only earns placement when the list it signs for is clean.